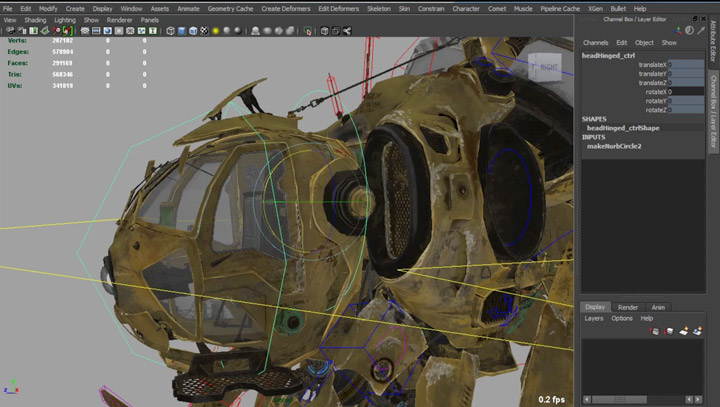
Carlo rigged our Mech Character, Hatch
Today, we have another special tips & tricks rigging blog post by Carlo Sansonetti! Carlo rigged our robust creature characters, Hatch and Dozer, available for the Creature Animation Courses. Carlo Sansonetti is a veteran character rigger and he worked on the TV show, Star Wars: The Clone Wars (Lucasfilm) and also developed rigging for Heavy Iron Studios. He is also the President and Cofounder of CGCircuit (read more about CGCircuit below), an online platform for sharing knowledge about the CG pipeline. Enjoy!
-The Animation Mentor Crew
5 Tips on What You Should Do as a Rigger
This list of Tips and Tricks is valuable for anybody who wants to start their career in rigging.
Tip #1 Learn Python
Since Autodesk introduced the scripting language Python as a way to script and write plugins for Maya, the level of quality and sophistication of technical art and rigs has increased considerably, so in order to stay ahead of the curve, one must learn to program with Python. The greatest aspect about Python is that it’s been around for a long time in many industries and so it’s very well documented and you can find modules that are very helpful.
Tip #2 Learn the Maya API
As I mentioned in tip #1, the sophistication of technical art and rigging has increased, and learning the Maya API is probably the best way to stand out. If you learned Python it’s relatively easy to pick up the API. Using APIs you can create plugins to really improve your rigs.
Tip #3 Document What You Master
The industry is changing rapidly and more and more studios are looking for people who can be versatile and know how to do different things. A rigger might be asked to do scripting or programming of pipeline tools, or modeling, or even VFX/Compositing. In order to always be ready to switch gears and do something you are less familiar with, I recommend always documenting what you’ve mastered.
For example, if you’ve mastered how to set up a cloth simulation, make sure to write down the steps required, or even create a video where you explain the process to yourself. In the long run you will amass a good collection of notes that you can use when you need them.
Tip #4 Give Your Rig to an Animator ASAP
It is very easy to get “tunnel visioned” when you work on a rig, especially if it’s a complicated one. So my tip #4 is to make sure you put your rig in front of an animator as soon as it’s ready to be animated. I like to do this early in the process, when the rig is not complete. This way I can get feedback early on. It becomes difficult to be willing to make changes if you spent a lot of time on something. Instead, let the process of rigging be something you share with an animator.
If you don’t have an animator available, post the rig online and ask for honest opinions.
Tip #5 Learn Web Technologies
As you can tell, most of my tips involve learning. That is because I am a firm believer that a technical animator/artist should always learn the latest technology available. One that I think is going to be the next big thing is web technology. Learning HTML, CSS, Java Script is already becoming a reality in the game world. If you haven’t thought about learning those, give it serious thought. And, last but not least, pick up an API or the most popular Cloud provider and learn that as well. I personally like Boto, which is the Python Library for the Amazon Web Services (AWS).
5 Tricks to Streamline Your Workflow
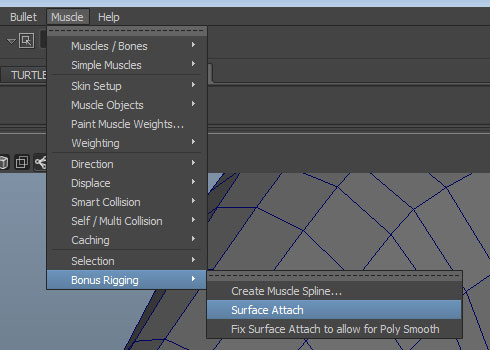
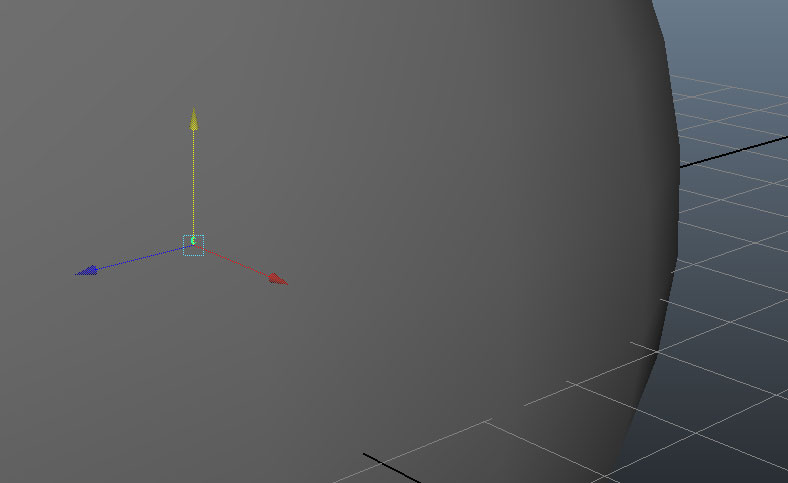
Trick #1 Surface Attach on NURBS
Using NURBS you can achieve nice results when you combine that with Muscle Attach nodes. For example, try to create a NURBS surface right on top of your skinned geometry, then select a Surface Point on your NURBS and click to Muscle>Bonus Rigging>Surface Attach.
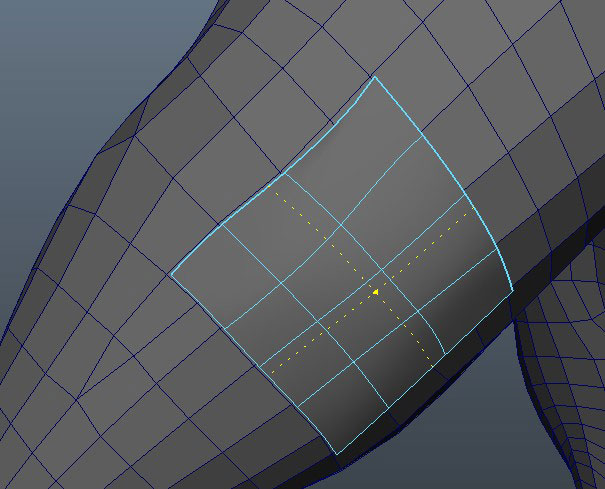
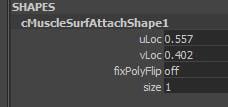
Now you have a locator that rides along the surface of your skin geo and you have the option to slide the locator on the surface of the NURBS using the uLoc and vLoc attribute on the shape node of the Surface Attach node. You can use this techniques in several scenarios especially when combined with joints.
One of my favorite scenarios is the ability to create a joint on a muscle group. For example if you want to have a control that rides along the character’s bicep, you can create a NURBS surface on that part of the geometry, then bind the NURBS geo to the same joints that are deforming the arm of your character, then transfer the weights from your main geo to your NURBS using the Copy Skin Weights Tool. This way NURBS and geo have the same exact weights and so they deform the same way. Now you can create a joint, align it, parent it to the Surface Attach node, and add this joint as an influence to your mesh. This way you can have a “surface joint” that can augment the deformation on that muscle.
Trick #2 Quick Selection By Type:
Use this command to select any joints in the hierarchy of the selected objects.
As you practice rigging, you will come to recognize patterns very quickly because a lot of tasks are repetitive and often tedious. So a great way to speed up your process is to create little helper scripts.
Below is one of the commands I find the most useful:
This script will go through the hierarchy of your selected objects and find all joints in those hierarchies.
If for example you want to hide all of your joints and lock the visibility channel for all of them, instead of hunting for them in the outline, you can just select the top node that contains the joints you want to hide, and run the script.
What’s great about this little script, is that you can change the word “joint” to another node type you want to search. For example, changing the word “joint” to “ikHandle” will find all the ikHandles in the hierarchy.
The Maya help provides a list of all the nodes you can search using this little script.
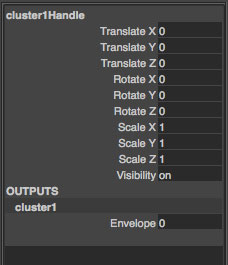
Trick #3 Use Clusters to Center Joints to Geo
This is a trick I found out of necessity. One of the things that you will do multiple times is to try to center a joint to certain volume. So the fastest way to do that it to select an edge ring that goes around the volume, convert the selection to vertices and then create a cluster.
When Maya creates a cluster, it will create a handle in the middle of your selection. So after creating a cluster, you can create a joint anywhere in your scene and snap that joint to this cluster. You have just placed a joint in the middle of your volume.
Trick #4 Mirror Control to Opposite Side
If you are creating a rig manually and you don’t have access to a script that automates the process of rigging both sides of the character, you will face the challenge of creating the same controls on both sides that are perfectly mirrored. A trick to expedite this process is to duplicate the group above your control, duplicate it, unparent it, group it, and set the scaleX value to 1.
Now the control shape is mirrored, but not the transformation. So the way to orient the transformation of the control correctly is to parent it to the joint that this control will constrain, then freeze transformation and unparent the node again.
Trick #5 Turn Skin Cluster Envelope attribute to 0 to Check for Precision Mistakes
When creating a rig manually, (i.e. without a script that position certain nodes and controls correctly mathematically), you might make several small mistakes. So small, in fact, that they might be very difficult to notice.
In order to check for these mistakes, you can select your skinned mesh, then select the skinCluster node in the channel box, and then turn the “envelope” attribute on and off. If you see any parts of your geometry shifting a little bit, it means your rig is not mathematically precise.
This trick can save you a lot of time, because it allows you to catch problems early on. So make sure you use it multiple times during your rigging process.
About CGCircuit.com
CGCircuit.com The Tutorial Marketplace
An outlet for cg artists
Created and Maintained in garages from California to Italy, CGCircuit is a web platform that makes the unique methods of computer graphic and traditional artists accessible through a tutorial marketplace. CGCircuit strives to be a resource for artists as well as an outlet where authors can monetize their knowledge. Since the beginning, the vision for CGCircuit has been to create an author oriented video platform like Vimeo or Youtube that is made by CG artists for CG artists.
The problem to solve
Being in the industry, it hits home when a company closes their doors. One of CGCircuit’s primary goals is to be a place where CG industry professionals can share their tips, tricks and techniques while earning extra income on the side. This is of core importance at CGCircuit because the founders of CGCircuit are also industry professionals. Carlo Sansonetti is one of the owners of co-founders, he has worked on several high level projects he is currently at Heavy Iron Studios as Senior Character TD.
HE says:
In a time when big companies are closing their doors and too many people are losing their jobs, the founders at CGCircuit know personally that there needs to a be a place where all artists can create a passive income to sustain themselves in between jobs.
How it works
It’s free to join and anybody with an account can upload their content. Authors keep 70% of the sales generated by their tutorials. CGCircuit uses some of the remaining 30% to advertise the content on major blogs and social media.
Well produced tutorials gain major traction and exposure all users that visit the site daily are part of the industry and artistic community. By creating and publishing your tutorial on CGCircuit, you are publicizing your name on a platform that is swarming with skilled CG artists.
Some authors who have published on CGCircuit.com have made up to $35,000 a year in profit!
Being author-oriented, CGCircuit strives to be industry current through updating and adding features such as the recent addition of an affiliation program. If you’re looking for an author supported CG community that values their authors then CGCircuit is your platform. Want to learn more? Visit the blog at blog.cgcircuit.com and visit the platform at CGCircuit.com.
Teach. Monetize. Learn