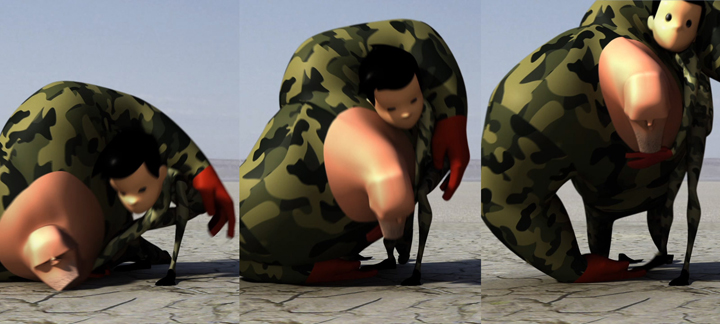
Our Student Showcase series continues today with an interview with Kevin Nguyen, whose shot featuring Stewart and Stan in the trenches of warfare pulled our heartstrings. Read on to learn more about Kevin and his animation process.
– The Animation Mentor Crew
—
ANIMATION MENTOR: Why did you choose Stewart for this shot?
KEVIN NGUYEN: For that particular shot I really wanted to show weight. I also wanted to play with contrast a lot. Since I was using the big guy, Stan, I needed his counterpart to be the exact opposite. Stewart was my first and only choice. I needed a rig that was both appealing and versatile. With his easy to work controls and all of the extra features, picking him was an easy choice. I had a lot of complicated poses within my shot and Stewart made it a lot easier to cope with. And on top of all that, he was already UV’d so texturing came easy for me.
ANIMATION MENTOR: How did Stewart help sell your story idea (as opposed to another rig)?
KEVIN NGUYEN: Stewart just has so many useful features that other rigs simply do not. He has seamless FK/IK switching, IK chest and head capabilities, extra deformers all over the body, and most importantly, he has extreme appeal. In my experience, there was never a rig that had all of these features. I could’ve used another rig, but then I’d be burdened by all of its limitations that Stewart simply didn’t have.
ANIMATION MENTOR: What was your favorite part about working with Stewart?
KEVIN NGUYEN: Stewart was just so easy to use. I could literally put him into any pose and he would still look appealing and dynamic. And if I wanted to push the poses even more, all of his extra deformers allowed me to shape him in any way that I liked.
ANIMATION MENTOR: What was the inspiration for your shot?
KEVIN NGUYEN: I had recently seen Lone Survivor and I got inspired to do a shot similar to that of what I saw in the movie, a soldier carrying off a fallen soldier.
ANIMATION MENTOR: What was your process for animating this shot?
KEVIN NGUYEN: My workflow has been fairly consistent for a while. For this shot I started with some planning sketches. Just 5-6 quick sketches to get the feel for what I wanted to achieve. Then I shot some video reference. The big guy, Stan, was played by my dad. For the part where he is on the ground and Stewart had to pick him back up, I told my dad to just lay there and not try to help me lift him in any way. So the struggle you see in the shot is completely real! After I got my reference I imported it into Maya where I then “animated” the reference, speeding and slowing things down, and adding holds where I wanted them to be. After I got my reference to play the way I liked, I blocked everything out as I saw it in my reference, but always keeping in mind to push poses and to pay attention to arcs and silhouette. Then after blocking is done, I splined everything, turned off my reference, and just animated away into polish. This shot took about a week to animate.
Love Kevin’s shot? You can animate with Stewart too!