Long-time Tippett Studio animator and mentor, Brian Mendenhall, shares his tips on how you can avoid the hang-ups associated with your animation workflows. Although there’s not one workflow that works for everyone, Brian shows us that the key is to find a workflow that works best for you and to always be mindful of improving that process. Read, experiment, and go animate!
– The Animation Mentor Crew
- Kickoff
- Assemble!
- Blocking
- Deliver to the Production Company
- Change it all!
- Progress
- Finish
To me one of the most important qualities to have when animating for a live-action movie is flexibility. It is important to understand that changes will be coming and to embrace it as part of your workflow rather than fight against it. One of the reasons for this is that visual effects studios are often tasked with creatively resolving issues with a sequence. I don’t want to say the visual effects sequence are not as thoroughly planned out as animated sequences, but many factors (shooting schedules, weather conditions, etc.) can change the final product from the original concept. And once the footage is shot, it is very rare that it will be reshot. When you get the footage (plates) from the production company, and after you add the characters to the scene, it is essentially the first time anyone has really seen the shot. And then, new ideas are born… With that in mind, here is a basic workflow for animation in a live action movie.
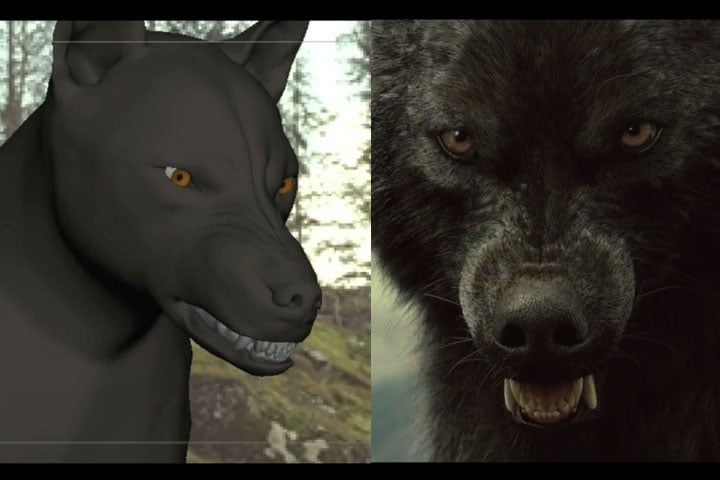
A nice breakdown video of the wolves in Twilight: Breaking Dawn
In a kickoff meeting you will be assigned a shot and given all the information that is in the studio. Sometimes there isn’t much of it, but I always try to pry a little and get as much info as possible. Particularly, make sure you know what the entire sequence is about. What shot leads into and out of your shot. Who is animating those shots and how does this sequence fall within the movie.
Read the script – If there are “unknowns” about the shot, recognize them as unknowns, so you know specifically what is expected and what is up to you to resolve: what needs to happen even if it is “impossible” and where is the creative wiggle room. Like I said earlier, the animator will be called on to resolve issues with a shot, so it is important to know what exactly the shot NEEDS to be. And even though it might seem obvious, I always try to ask about the very broad purpose of the shot. Through many layers of communication (and the lack of instant director access) sometimes the big points get lost. So try to ask things like: Is that action supposed to be funny? Scary? Mysterious? Does this shot relate to this previous shot as a call-back perhaps? What is the audience suppose to feel? If this is not obvious it is good to open a brief dialog about it. That being said, know when it is time to shut up and let your mouse do the talking. Don’t pester your supervisors with every question you have. It is a creative role and you should be able to make some good decisions on your own.
An example of a VFX Breakdown shot in the film Mirror, Mirror
A visual effects shot consists of a background plate, a matchmove camera, a matchmove set, and any matchmove stand-ins. The matchmove department will use the footage shot, and other information taken on set to create a virtual camera that follows the motion of the real camera. They will also generate a set of geometry that represents the real world set for your character to perform in. Any actors or moving objects that your character interacts with, will also be matched by that department and are referred to as stand-ins, typically. Make sure you have assembled all the latest pieces before you start animating. It’s also likely they will give you a temp matchmove to start with, so be prepared to update the assets as needed. Then, bring in your rig or rigs. I think every studio uses some form of referencing to allow easy rig updates. Be sure you understand and are comfortable with the concept of referencing rigs. It is vital to keep things up to date.
A great video with Brian Mendenhall and Jim Brown on animation workflow tips
Check your schedule to see how long you are allowed for blocking, or for the shot on the whole, and use that to plan your attack. Raise a red flag if your schedule seems unattainable from the get go.
Start blocking – In visual effects, a huge challenge is making sure the action fits with what was shot. The plates are not going to change, your character needs to fit like it was there the whole time. This leads to many creative solutions that were not initially considered. For example: having a character slip or become distracted to slow them down if the camera is too slow or cover a huge distance or reach an object in a way that was not planned. So it’s good to do a VERY rough placement or “post-vis” pass to reveal any of these issues before you even shoot reference or think about performance.
I have a theory that any shot can be blocked in a day. There are exceptions, but from cinematic perspective, there are only so many things an audience can notice and only so many things a shot can say before it is naturally time for a shot to cut. This does not apply to Peter Jackson, obviously, but it’s usually true. With that in mind, there is a natural hierarchy of priorities for any shot. What is the audience going to be looking at? What character or part of a character is key? What needs to read? If you focus on these primarily you can get something roughed in before the end of the day. This is fun time. I always assume that anything you try in the first day is worthwhile. Be risky. Make the shot your own. But after that first day, and after you receive direct feedback, you need to alter what you’ve got to address the notes. Hopefully they love it. If not, you cannot continue to try and sell an idea that was not loved.
Not all studios deliver blocking to the director, but it’s used for approval by your peers and supervisors. Keep things very clean. Only put in as much information as necessary to get approval, which will allow you to make changes quickly. Our studio requires linear keys in blocking (as it will otherwise look odd against a moving BG plate) but some studios do not.
Everyday at our studio has the leads gather to look at last night’s dailies in “leads cut-ins”. They agree on notes which are recorded by a coordinator. Then the entire animation team assembles for “cut-ins” where we watch the dailies in the sequence together and discuss the notes. Then everyone returns to their desks to work. Around 3 we have “rounds” where the leads walk around the department to check on progress and give more notes (theses are not officially recorded). This is not as mandatory if you have nothing to show. About a half hour before quitting time, you make a daily to be viewed first thing next morning. You are expected to make a daily everyday. It’s right there in the title. Then you go home and do it all again the next day.
Eventually what you have is delivered to the client. There may be a day or two gap between delivering a shot and getting notes back. You will usually have more than one shot to work on to fill gaps between deliveries. I appreciate this, as sometimes it is nice to get away from a troubling shot for a while. I always have a new perspective when I get back to it. The supervisors will Skype or call with the director to discuss the shots. A production person will type the important notes for record keeping. You will most likely get your notes as text. Your supervisor will walk you through the notes and help answer any questions. Do not try to interpret the notes differently from what you supervisor says. It is their job to distill the notes into a strategy. It is already a long chain of ambiguity, and if you reinterpret the notes it only adds another link to that chain. Again, at this stage I always try to ask and understand the “intent” of the note as much as the specifics. Especially if the specifics don’t seem to make sense…
Yes, here we go changing the whole shot. Try hard to not get hurt or upset by large changes. I have found time and time again that with proper perspective and time, the director’s reaction to the shot is correct. He is looking at the movie through a different lens and has a certain expectation for the shot other than that cool thing you thought would look good on your reel. The important thing is to not fight it and try to really embrace the note. Find a way to make that look as cool as possible. It’s easy to get stuck in your own little world, but fighting for your own note usually ends in trouble. This is just the nature of a disconnected production crew.
Since you expect changes, I suggest always setting up your scene to allow it. Find a way to create constraints that are easily swappable,in case you need to change props, sets, or even rigs. Use animation layers to add high frequency noise and offsets, if it helps keep your graph editor clean and manageable. Set your scene up in a way that axis make sense and are beneficial. Starting a scene with the Y slightly off up, or the X and Z pointing in random ways, will cost you time with every single change. The initial set up is always worth it. Get used to constraining and baking animation locators to alleviate these issues when they appear, rather than struggling with it for the life of the shot.
At Tippett, after blocking we go to a pass called “Temp” which is essentially animating the shot just short of secondary bits and bobs, and interactions. Once you are confident with your blocking, the next step is to simply animate as much and as fast as you can until it is due to deliver again. There is no reason to hold back other than your time constraints. Continue to get feedback a couple times a day internally to make sure things are getting better. Always hit director and supervisor notes first so you know how they will affect the rest of your actions. Always hit director notes hard, so anyone can see the change. If something is not working, delete it and try again. Just make sure nothing in your shot is “broken” when it is time to deliver again. Always know your delivery schedule.
This is the time to start seeing your shot lit and textured, to get a better idea of how it will look finaled. Things can change dramatically with lighting, so hopefully at this point the lighting crew is starting to take your shot and at least run test lighting. Find those dailies. Know your lighter. Even if it is not part of your normal routine, you should find those dailies. Make sure your work is still reading how you want it when it’s lit. You’d be surprised what a different motion blur calculation can do. Check how contact shadows and intersections are looking. If something seems way off, you may need to check with the matchmover to get a tighter match. You may need to talk to lighting and comp to find out how certain problems will be resolved. Be vocal with your supervisor during rounds about these issues.
Now it is mandatory that you are checking lighting dailies. Your animation is not final until it is final under lights. Time to do a sweep and check every foot, hand and prop contact. Scrutinize every frame for issues. Be on the lookout for gimbal flips especially. Don’t let someone else catch your mistakes. From Temp anim to Final the to-do list becomes very technical. Hit any new director notes and then work to clean every little thing up. This pass should only be a sweetening pass, and as such, you should be able to tackle most of it with a straight-ahead approach. The biggest issue is remembering all the little things. My strategy is to look at the latest lit render and make a huge list of every little thing I want to fix. After I have my list I put a number next to each note as a priority and order that I will address them (a 1-3 system is fine). I then put an estimated time to hit each note and then add up the total time. You’ll be surprised how fast it adds up! Then I know about how long it will take and what will most likely fall off the list. Reprioritize if necessary. Then, I put on the old headphones and grind away. This pass can be very meditative and fun with the right mindset. For most shots the final anim pass take 1 – 2 days. One day to hit any final notes, and a full day of just polish. That’s how you get that photo-real look.
Check out the latest render again when it comes out, and discuss with your lead if there is anything left to do or time left to do it. Our deliverables need to be approved for Final Animation, then Final Comp, and finally, full-res FINAL. It’s good to track the shot all the way to the end of it’s production life and don’t consider it done until it’s final final.
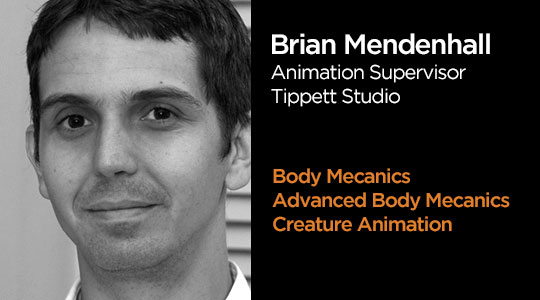
Brian Mendenhall is a 10 year animation veteran. You can see some of this work in Ted, Hellboy, and Constantine. He is also a veteran mentor at Animation Mentor since 2007. He’s taught Body Mechanics, Advanced Body Mechanics and the Creature Courses.