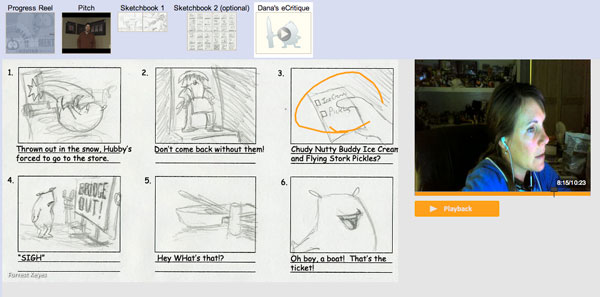
*Image from an eCritique feedback video from Dana Boadway (mentor) of Forrest Keyes'(student) storyboards
Animation Mentor’s new class Introduction to Character Animation and Storytelling, was created and tailored to address studio feedback that students needed production experience. This is why our AMP production pipeline is so essential to what we offer as an online school. We are the first online school to offer a real production experience that teaches students exactly what studios are seeking in new hires. Today, student Forrest Keyes, describes the 10 Things He Learned in Introduction to Character Animation and Storytelling.
If you have animation experience and looking to develop your production skills, produce a short film, and work 1:1 with industry professionals – then apply today or place directly into a class with our Advanced Placement options.
Thanks to Forrest for sharing his experiences from class with the community!
-The Animation Mentor Crew
—
10 Takeaways from Introduction to Character Animation and Storytelling
By Forrest Keyes
1. The animation assignment is four times the work load, because it’s twice as long and with two characters instead of one.
2. Scene composition becomes more involved, because it can greatly effect the way the interaction between the two characters feels.
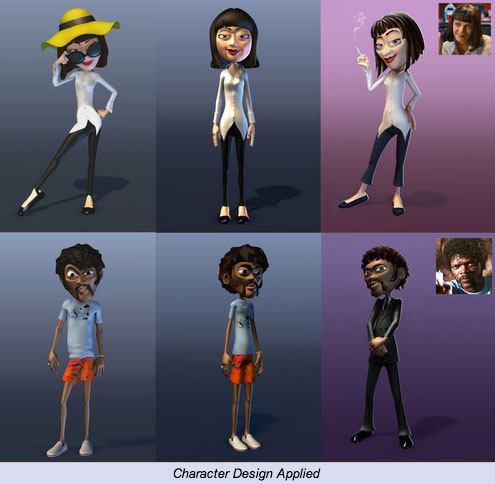
3. Make your character design choices carefully, because you will be stuck with them for the entire project.
4. Referencing can complicate your project in that glitches can occur where key frame information on a referenced object can be lost, if the reference that is key framed, becomes corrupted. The best way to guard against this is to save and check-in any changes. Make sure you give an explicit description for your check-in to know what each version contains. Also, if you have problem with a particular file and you revert to a previous version, but you still have the same issue. You may need to revert associated files being referenced as well.
5. Working with AMP pipeline was very similar to previous centralized, version control repositories that I have experienced in a video game production environment, such as, Source Safe or TortoiseCVS. The difference is that I couldn’t pull-down all assets with in a folder at once. I had to right-click on individual containers to download an asset. This can get tedious if you have very many assets you are trying to access. The solution could be, not to place every single asset in it’s own container, but just groups of assets based on a category of some kind per container.
6. Using AMP pipeline in CS01 (Intro to Character Animation and Storytelling) is not critical to your assignments for this term, because you don’t collaborate on shared files with fellow classmates this term. It is really just an exercise in getting you used to interacting with a centralized version control repository, if you have never done so. So that you can spend more time actually being productive together next quarter, instead of wrestling with the system.
7. Time management will be more important then in previous classes. Finding a strategy that gets your animation developed as quickly as possible will make a big difference in how much, if any, polish you will be able to get in on your animation. Things to avoid are noodling to much on one part of the animation, (save this for the end) otherwise your animation is going to have huge swaths of unpolished sections.
8. Don’t stay in block for too long. You only have 9 weeks for your entire animation. (7 if you throw out the first two weeks which is all about coming up with your dialog and video reference) The last two will be focused on story pitching, and of course the final week is your progress reel. Blocking is good for getting strong poses, but most of the time does not have the correct timing. This can be a tough transition for a lot of people, so the sooner you can get that out of the way, the sooner you can start working on path of action and spacing.
9. If your main goal is to have as polished an animation as possible, be careful about too much experimentation with your workflow. I tried out some new workflows that involved animating straight ahead in spline mode. This allowed me to establish the timing early in the development, but I got bogged down in path of action stuff to early with setting lots of keys close together on the timeline. This made making sweeping changes cumbersome, or lead to lots of throw away work, through the process of fence posting on key poses and deleting out keys in-between, that I had wasted time on.
I also chose to introduce myself using FK arms, when all the while through the program, I had used IK arms. Although it was good for me to learn, I underestimated the learning curve. This lead to many all-nighters, because I spent lots of time noodling over the path of action of my character’s wrists. This is more of a mind set for an IK arm animator where you see the imaginary path that you want the arms to take through 3-D space independently from what the torso is doing.
I know now, that when working with FK arms, to think of each arm segment’s arc through whatever action independently, and to layer in the overlapping/delay of each successive joint. That’s why being able to hide parts of the body is useful, so as not to be distracted by the next joint down the line. When I animated in IK, I never found this useful. A great lesson to learn, but brutal to learn it on a project that is 4X larger then anything you have worked on thus far. (by the way, if you want to hide parts of the model, I have found that it only works on the original file and let it update that attribute to the reference in the scene, rather the trying to do that directly on the reference.)
10. Know that any interactive props will syphon off time from working on animation on your character, so manage and plan that time accordingly. I had a chip bag that one of my characters carried to a couch. He unfurls the bag and dips his hand in. At first I created a lattice on the bag and added it as a reference in the characters main file that got referenced into my scene. Something with the referencing interfered with animating the points of the lattice. So I had to go back in mid-stream and re-rig the bag with skeleton joints, since I knew that that would work with a referenced file. Again, great to learn what works and what doesn’t, but this took yet more time away from other things.


