Animating faces is complicated. Here’s a tip from our own Shawn Kelly to help you tackle facial animation like the pros!
TIP: The Face Is One Cohesive Unit
Most facial rigs break the face into somewhere between 15 and a gajillion different face shapes. So, once you’ve finished all of your planning, and you’ve got the most emotionally communicative reference you can get your hands on, it’s time to sit down and actually start animating all of those face controls.
An example of a facial rig
Some facial rigs are made up of joints, some are blend shapes, and some are a combination of the two. Some of you have facial GUI’s, some of you have overall expressions you start from, some of you start from scratch and just dive right into the individual shapes. Some of you even sculpt the shapes yourself as you find you need them.
None of that matters one bit.
Sure, some methods are faster than others, and some give you more control than others, but for me – the single most important thing in facial animation (other than the overall overriding super-mega-ultra-most-important thing: make sure your emotions read clearly!) is that the face works as a single cohesive unit.
One of your biggest goals with facial animation should be to make sure that the face doesn’t look like a bunch of independent shapes moving around.
I’m sure many of you have already experienced this problem (I know I have in the past!) — you’ve got a gajillion different ways to control the face, so you’re potentially animating a gajillion different things at any given moment in the face, particularly if you’re doing realistic or subtle facial work. It is VERY easy to end up with a facial performance that feels more like a gajillion different little parts moving independently of each other than a single face acting and reacting to the world around it.
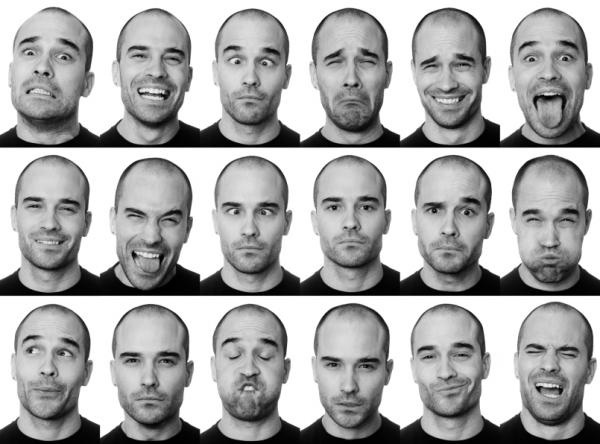
Think of the face NOT as a collection of “facial shapes” or a bunch of “joints.” Study your reference. Find the simplest way of recreating (and hopefully plussing) the emotions and movements you see in your reference, and then as you’re animating those gajillion controls, be sure to remember, every step of the way that the face needs to read as one unit.
Different parts of the face need to affect each other, and be affected BY each other. Exactly the same way you make sure your character’s body doesn’t look like a bunch of independently moving limbs, your face is a series of connected bits that all work together to communicate with the world around it. All those gajillion controllers should be working together to create the illusion that there is only ONE controller — the brain — and you should use those gajillion controllers to support the ONE main idea of the scene!
That’s when your character will truly come to life. That’s when the performance will be memorable to the audience.
That’s when your character will be “animated” in the truest sense of the word.
However, be careful not to key all of your face shapes on the same keys. You’ll want to keep track of overlap. Remember the principle of lead and follow, and apply it to the face. What moves what? What moves first? Do the eyes lead the facial performance? Do the brows lead the eyes? Study things like this in your reference, so the face doesn’t feel robotic.
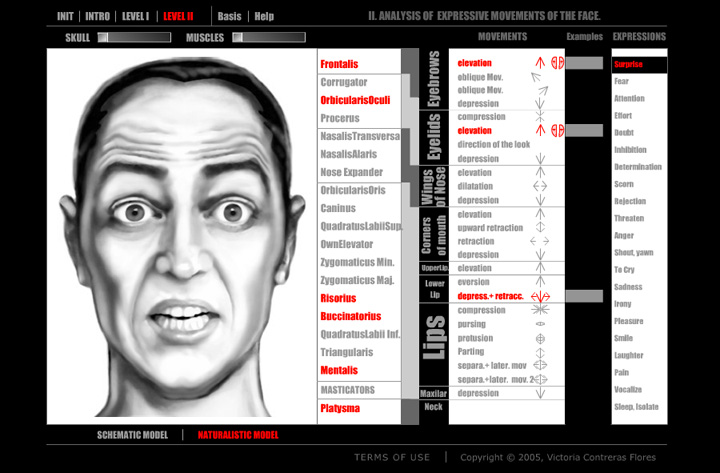
An example of a facial expression tool you can use at Artnatomy to see how the facial muscles interact with each other with different facial expressions
Image credit: ARTNATOMY/ARTNATOMIA – www.artnatomia.net – Victoria Contreras Flores – SPAIN – 2005
For example, the eyebrows almost always lead expressions. Is your character going from sad to angry? It’ll probably read best if (after already selling the thought process in the eyes) you start the actual physical transformation in the brows. Have them push down into the eyes, which then would either narrow the eyes into angry slits, or give the eyes the “flat-top” wide-eyed look of a guy about to rip your arms off.
Is your character being surprised by something? It’s probably best to yank his eyebrows up before widening his eyes at all! Sure, it’s probably only offset by a frame or two, but this sort of thing can add a wonderful organic quality to your animation that would otherwise be missing, leaving your scene feeling stiff and dead.
Since I’m already talking about it, a great way to think about this stuff in the eyes/brows is that the brows push and pull the eyes around. That won’t be the case 100% of the time, but it’s a decent rule of thumb that can help you through the majority of your scenes.
Okay, that’s two tips for the price of one!
—
To get more free animation training, download our free ebooks.