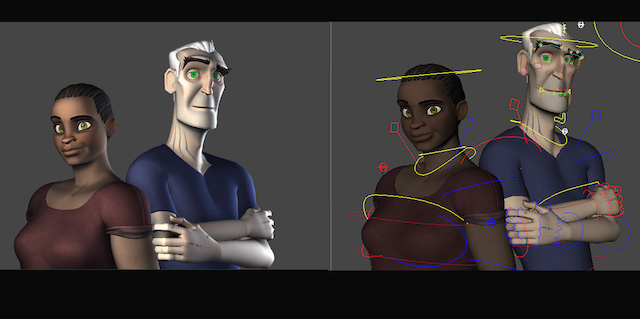
We’re excited to introduce two of our new character rigs, Viktor and Moya, available to our Character Animation Program students and alumni! These expressive rigs were designed from the ground up with animation in mind, and we’re happy to share a behind-the-scenes look into the process that went into creating these two dynamic characters!
-The Animation Mentor Crew
In the Beginning: Getting Organized
One of the best parts of working on these rigs was getting to work with amazing talent from all over the world! To ease communication among our 8 team members, we used Artella, a virtual studio platform, to manage our character creation pipeline. Artella made it incredibly easy to stay on top of things and to make sure everyone had the most up-to-date version of each character at each stage of the pipeline.
Communication is key for any creative team effort, and it was essential that we were able to stay on the same page and share ideas, feedback, and assets efficiently.
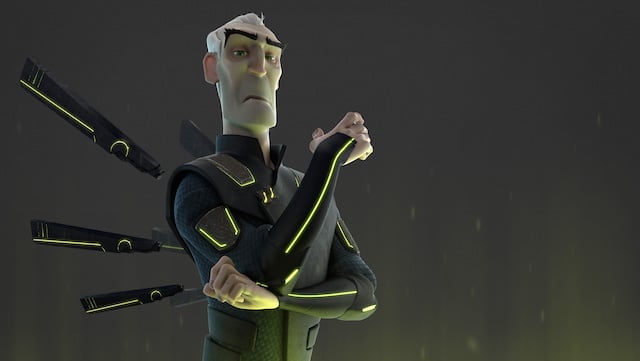
Introducing Viktor, The Overlord
Creating a Backstory – Guiding the Team
The early stages of the design process are lot of fun to explore, but it’s easy to get overwhelmed with the limitless possibilities. One thing we found that really helped when designing the Crew was to create a backstory for that group of characters. It helped the creative team to rally around a general idea and it also helped inspire us in new directions.
We followed that same principle when we kicked off this project. We dubbed this group of characters The Horde, a group of more militaristic characters with a sci-fi supernatural twist. Think Alien meets Game of Thrones meets Star Wars: Clone Wars. Early on we defined three main archetypes we wanted to design: The leader, the muscle, and the mystic (who is coming soon!).
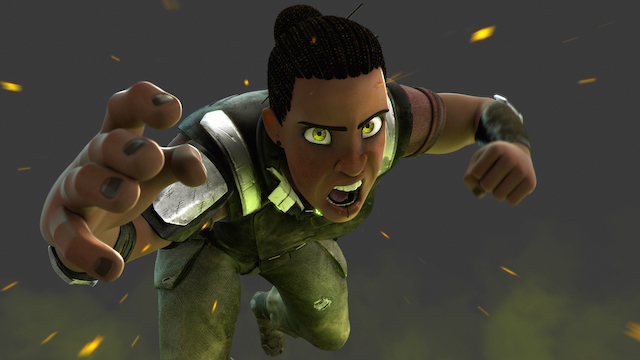
Introducing Moya, The Enforcer
We wanted to create very specific looks and costumes for these characters, but at the same time they needed to work for a wide range of student shots. We decided that we’d then create the fully costumed version for the characters, as well as their civilian look.
Character Design – Finding the Idea
It’s the character designer’s job to take that initial direction and start generating the visual ideas. We went through lots of iterations for all the characters, each time getting closer and closer to finding “the character”. That was when a particular design would really stand out and we could feel the personality of the character resonating through the image.
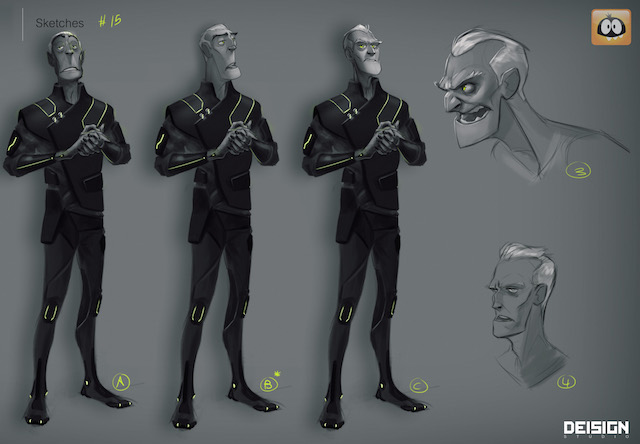
Character design sheet for Viktor
Viktor’s working name was The Overlord, and he was designated as the leader of the Horde. We saw him as incredibly intellectual and shrewd, always thinking at least ten steps ahead. We knew early on that he was going to be a tall and imposing character with strongly defined features. We found the general look of his body and proportions early on, but went through a lot of design iterations on his head and facial features. In the sketches above you can see some of the exploration we went through. That set of sketches, in particular, was a turning point where we really felt the look of the character starting to come to life.
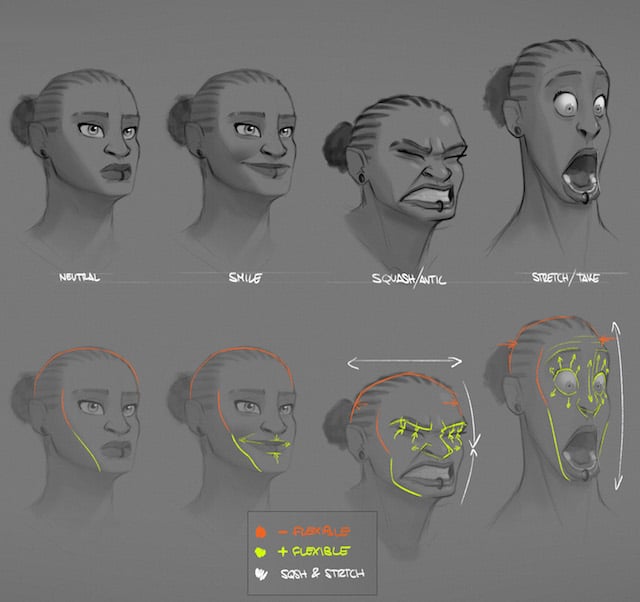
Expression sheet for modeling and rigging reference
Moya’s backstory was that she had a military past and became The Enforcer working with The Overlord. She’s a one-person tactical ground unit, strong of character, and can hold her own in any situation. We wanted her design to feel grounded and real and veered away from the princess look.
Part of our design process included exploring the range of facial expressions for each character. This helps us picture the character in action, helps the modeler and rigger plan out their approach to the character, and also let’s us make sure we are going to have a nice facial range of motion and expression for our students to animate.
Modeling – Transitioning from 2d to 3D
The modeling stage is always fascinating, where you can finally move the design around in three dimensions. This allows us to really get a feel for the character design and see what’s working and what new problems come to light. Sometimes you’ll find that certain proportions looked great in the 2d design but don’t feel right in 3d. It’s then a back-and-forth as we stay true to the spirit of the original design, while making adjustments so it works and looks great in 3d.
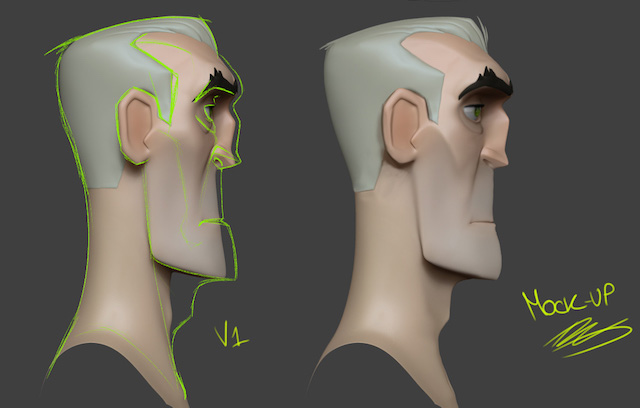
Feedback for modeling, tweaking facial proportions along the Z axis
We found early on that it was great to have a basic placeholder texture on the character when reviewing the model. It made it easy to see the end result we were aiming for and where adjustments were needed. It also helped us see elements we wanted to accentuate or tone down. When modeling Viktor we really wanted to accentuate the crisp edges of his design.
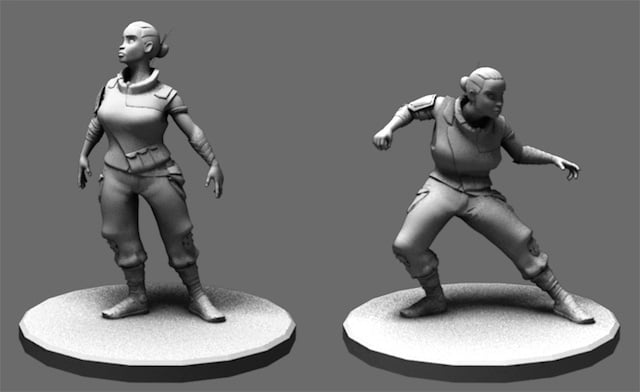
Final model for Enforcer version of Moya
One of the modeling (and later rigging) challenges was the asymmetrical design of Moya. From a design standpoint, we wanted all aspects of her clothing to feel functional, and having that read on the model was key. It meant that the modeler had to really get creative and work out the placement and design of each element without relying on symmetry tools.
Surfacing – Color and Texture
In creating the look for these characters, we were going for stylized realism. We wanted the characters to feel visually grounded in a world and not seem too clean or untouched. We added a lot of dirt, wear and tear, and general distress to many of the textures to achieve that look and feel.
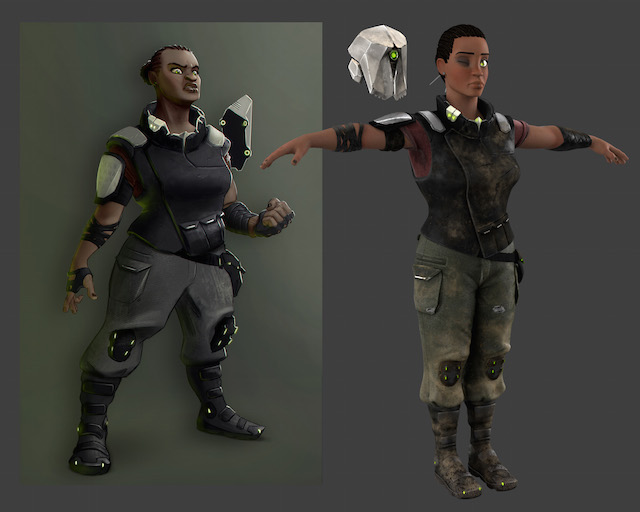
Final character design on the left and almost final surfacing on the right
We wanted Moya’s shading look to support her role on the team and the history she’s been through. It was important that all aspects of her outfit felt functional and like they’ve been in use for a long time. That was something we explored a lot in the texturing and materials stage. It was great to see the surfacing artist really getting into that idea, and designing in scratches and scars from previous battles.
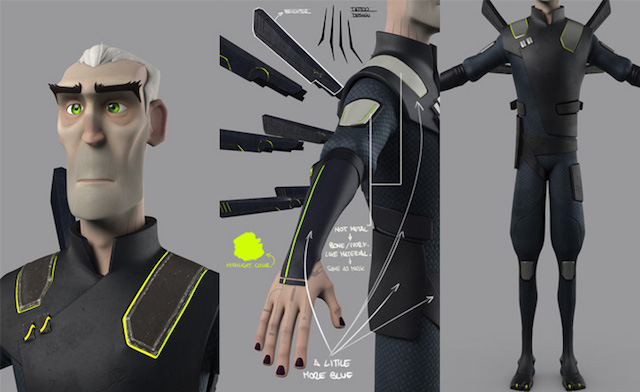
Refining the textures and materials for the Overlord
In contrast to Moya’s look, we wanted Viktor’s outfit to feel much more pristine. It was still important that it feel used, though, and striking the right visual balance took a lot of back and forth. At the same time we were always evaluating the simple read, making sure the visual look would translate well into Maya.
Rigging and Animation – Breathing Life into the Character
Rigging is where an actual skeleton is built inside the 3d model to move it around. It’s at this point that we can finally start to pose out the characters and explore how they’ll move. Our emphasis is to create animator-friendly character rigs with a wide range of movement and fleshiness. It’s really important to build in features to allow animators to get really dynamic performances to bring these characters to life.
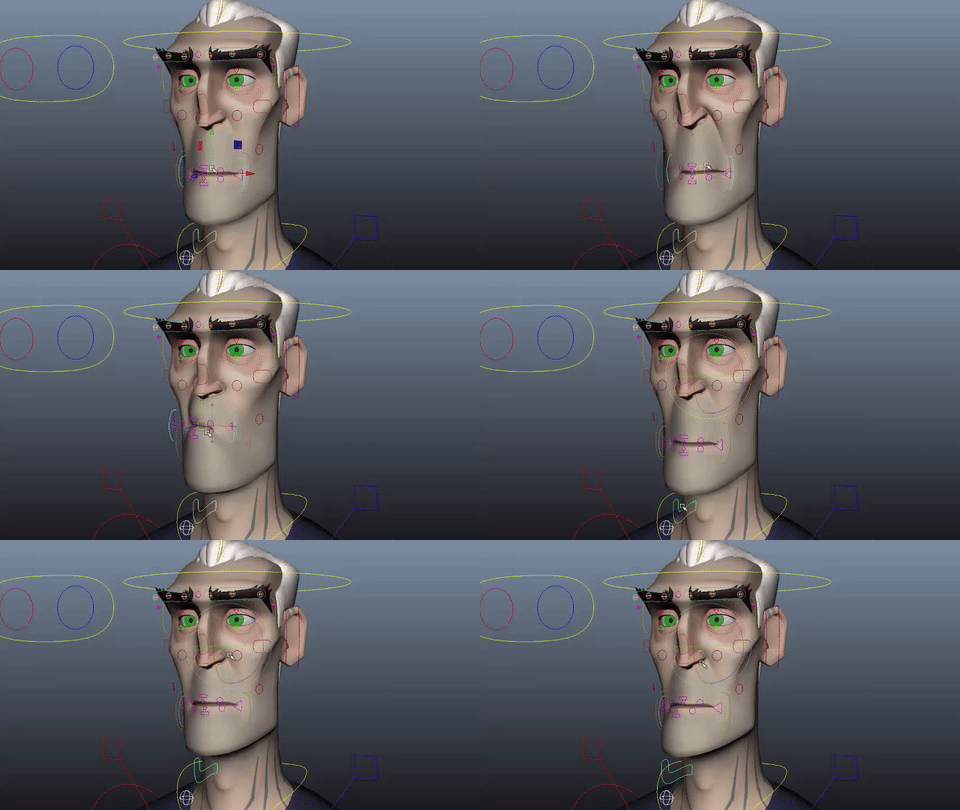
Facial controls in action
What’s great about these two characters is how easy they are to work with and the range of expressive poses we’re able to achieve. They’re very responsive in Maya, making it easier to block out shots quickly and then evaluate animation directly from within the viewport. When making functionality choices on the character rig, it always came down to what would be best for our students.
Sunhee Montenegro's animation for Class 4: Intro to Acting from Animation Mentor on Vimeo.
In the end, everything we’re doing is in service of creating an awesome character for our students to animate. The backstory for these characters helps us internally as we develop them, but the real personalities will come out in the performances our students create!
Cheers!
The Animation Mentor Crew
Want to animate Moya and Viktor?
Start your animation journey by learning with professional animators from studios like Pixar, Disney, and DreamWorks! Get more information about Animation Mentor’s Character Animation Program.
