
Today, Animation Mentor alumni and Student Showcase winnner – Manar Al Tawam – stops by the blog to share a workflow for lighting your shot. There are many ways to light your animation, each process is different, and each scene requires careful attention. This step by step tutorial is just one way.
To go deeper into lighting and rendering, check out our VFX Fundamentals course.
Enjoy!
-The Animation Mentor Crew
—
I’ve been asked on multiple occasions about the methods I use when rendering my assignments at Animation Mentor. In this step by step tutorial I’ll explain my approach in lighting my last assignment ‘I speak Hun’, it is an exterior shot so this method works the best for similar shots, if your shot is an interior it will require a completely different scenario.
1.) DOWNLOAD: ‘AM_LighingYourShot‘ file, unzip, then set your Maya default project to the downloaded folder.
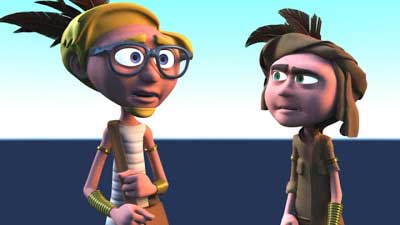
2.) LOAD THE SCENE: Load the scene called ‘Start’ and right away, make a test render. The scene has no light setup yet, the lighting you see on the characters is Maya’s default lights, it’ll look like this:

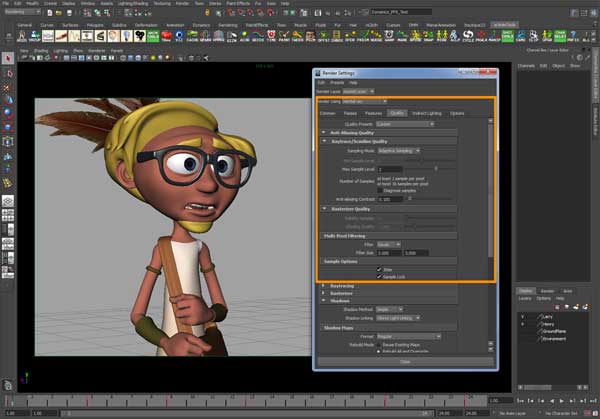
3.) RENDER SETTINGS: From the render settings window, change the rendering method from Maya Software to Mental Ray and make a test render, there will not be a noticeable difference. Before we start placing lights in a scene, I’d like to pump up the quality of the render, you can do that by going to the render settings, click on the Quality tab, and change the Quality Presets from ‘Draft’ to ‘Production’ then click on the ‘Jitter’ check box to turn it on:
4.) PHYSICAL SUN AND SKY: In the next few steps we’ll start adding lights to the scene. Most people like to use MR ‘Physical Sun and Sky’ for a quick nice results, I like to use it too but in a slightly different way, let me demonstrate.
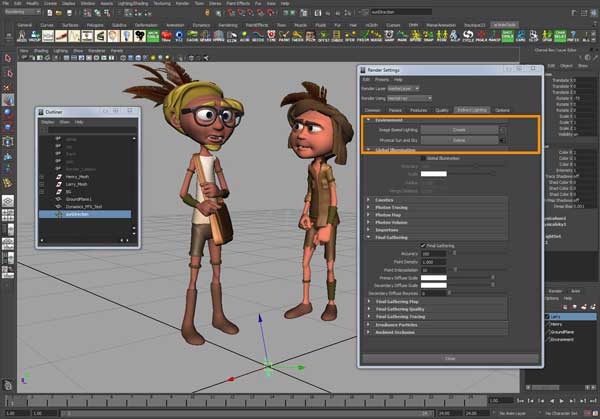
To add Physical Sun to the scene go to the render settings window, click on the ‘Indirect Lighting’ tab then click the ‘Create’ button next to ‘Physical Sun and Sky’ then do a test render:
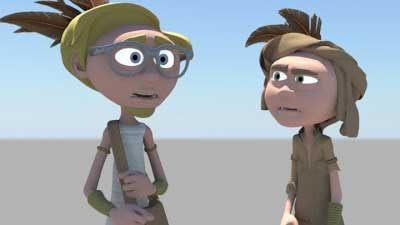
It doesn’t look bad for a sunny day, but I would like to go for a softer feel, so what I usually do, I select the light created by the Physical Sun & delete it to get something like this:
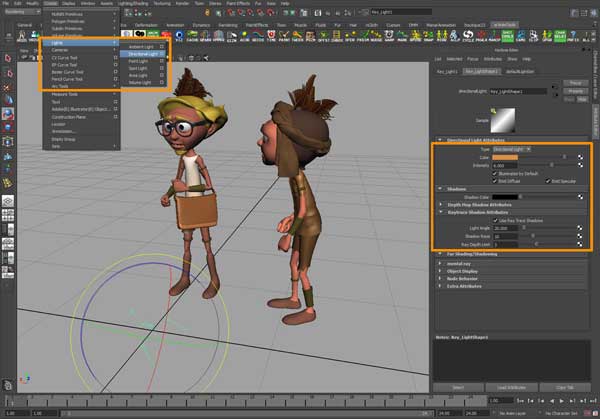
5.) ADD LIGHTS: After deleting the sun light, I’m only left with the virtual sky dome which adds a nice ambient blue cast to the scene, this will allow me to add my own lights for better manipulation. From the main menu, go to Create > Lights > Directional Light. This light will act as the key-light in the scene so name it ‘Key_Light’ and change its Angle, Color, Intensity and Shadow Attributes as follows:
To create a back light, duplicate the key-light and re-name it ‘Back_Light’ then rotate it so its hitting the characters slightly from the behind, & change its Color to light blue:
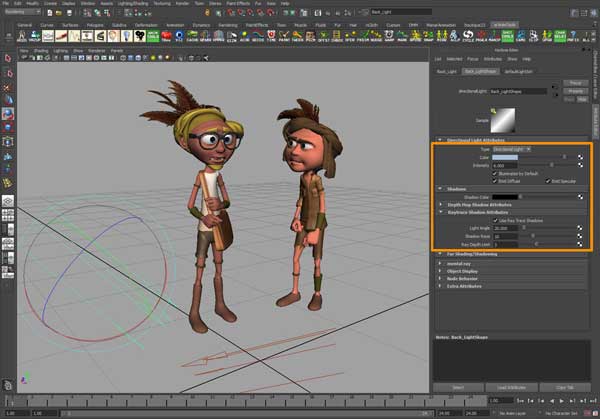
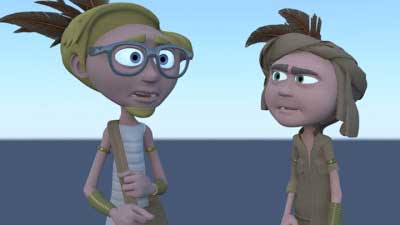
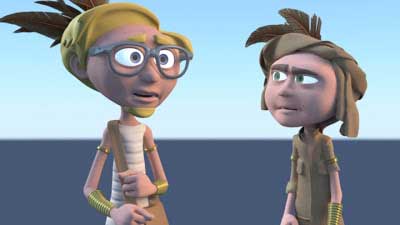
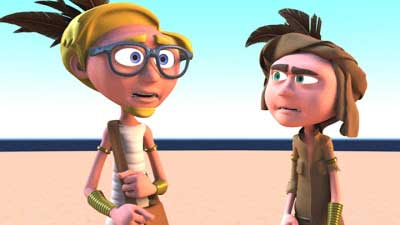
Hit render, you should end up with something like this:
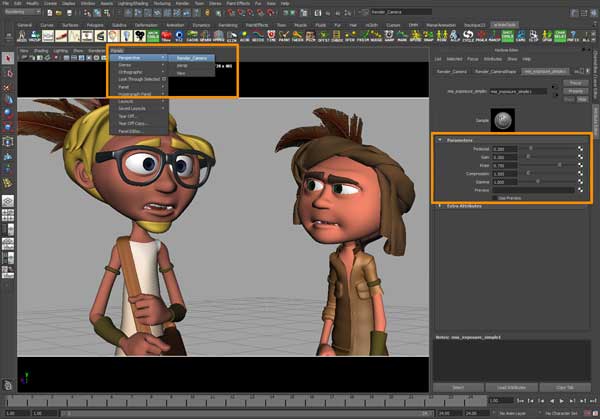
6.) LENS EXPOSURE: When a physical sun is created in a scene, a new node called ‘mia_exposure-simple’ is automatically created along with it & connected to the Camera, this node is responsible for grading the exposure & levels of the rendered images, just think of it as adjusting the contrast of the rendered image on Photoshop, but its done directly in 3D. Let’s tweak the parameters of this node to give more contrast to the image.
From the 3d viewport, change the camera from ‘presp’ to ‘Render_Camera’ then click on the camera icon in the corner of the viewport to select it, hit Control + A to open the Attribute Editor window, then click on the ‘mia_exposure_simple1’ tab, change the attributes as you see it in the snapshot then test render:
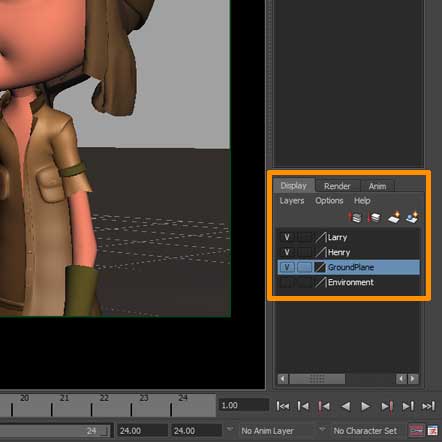
Now that the rendered image has a better contrast, we can add a ground to the scene, it will give a nice bounce light on the characters & eliminate most of the dark spots. I already created a ground plain in the scene with a simple Lambert material, to make it visible just click on the V button in the Channel Box and test render:
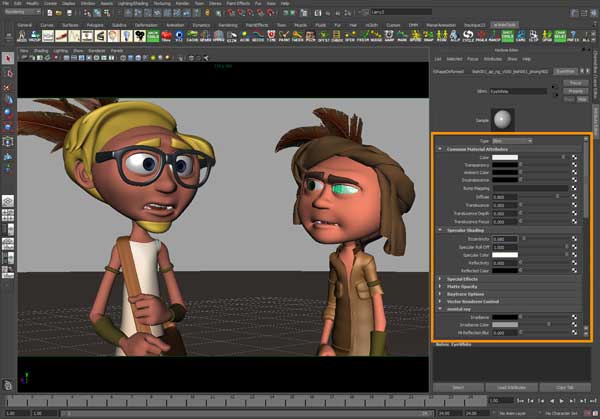
7.) TWEAKING THE SHADERS: Now that we got the lighting looking fairly good, we need to work on the shaders, mainly for the eyes & skin. Select one of the eyes & open its shader attributes, change the shader type from ‘Phong’ to ‘Blinn’ then tweak the parameters as illustrated, take a quick render to see the changes:
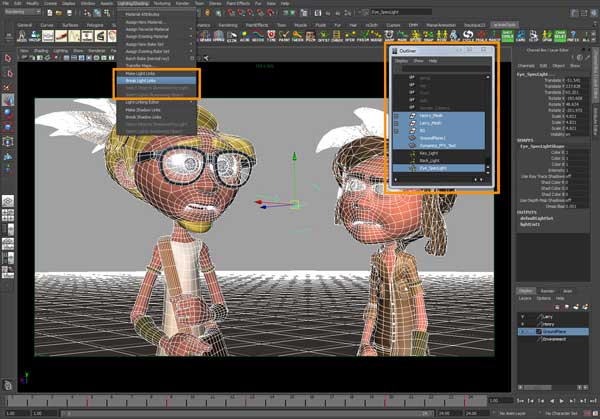
Now we need to add a highlight to the eyes to give it more life, for that we need to create a new light, disconnect it from all objects in the scene other than the eyes. Create a new Directional Light, rename it to ‘Eye_SpecLight’ and rotate it so its hitting the characters from the point of view of the camera. from the ‘Outliner’ window select all objects in the scene, Shift select the new light, and go to: Lighting/Shading > Break Light Links:
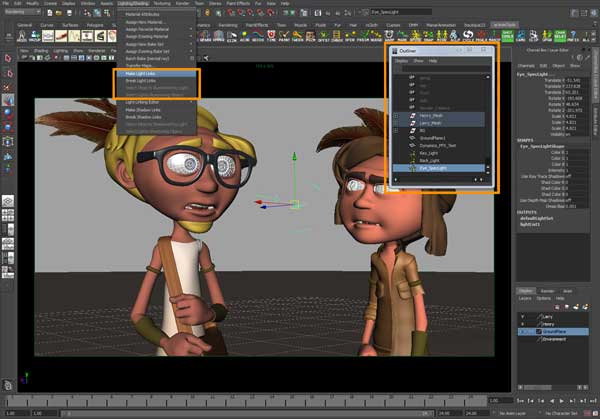
Then select the eyes on both characters, Shift select the light, and go to: Lighting/Shading>Make Light Links. Test render:
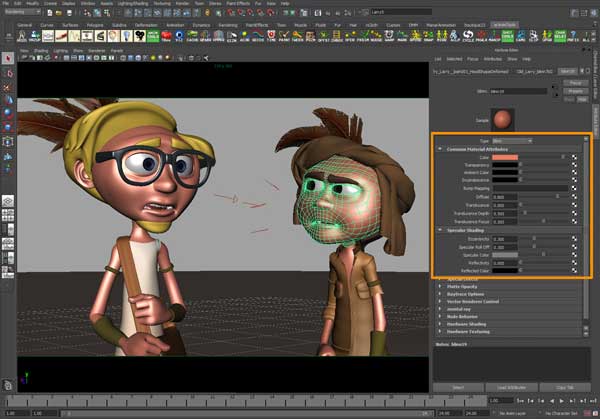
Adding a little bit of specular to the character’s skin will make it look less plasticity. To do that, select Larry’s face and go to its shader attributes, change the shader type from ‘Lambert’ to ‘Blinn’ then do the following changes:
Repeat this step for all skin shaders in the scene, & test render:
7.) PAINTING TEXTURES Hover the mouse over Larry’s face and right click, from the pop-up menu go to Paint>3D Paint. This cool tool will allow you to paint directly on the geometry, but before you start painting you’ll need to assign a new texture, to create a new texture click on Assign/Edit Textures, Size X/Y 1024 then click assign. Now you can paint directly on the face:
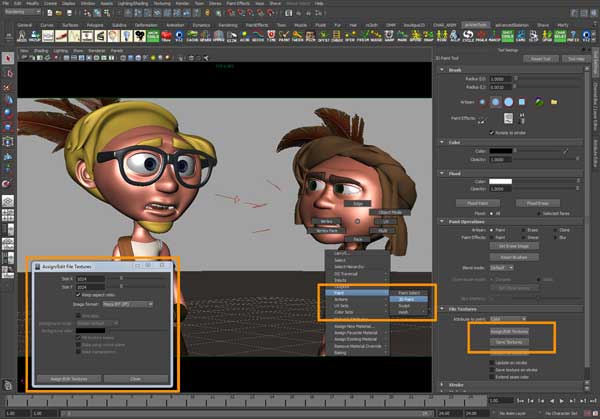
For more info about this great tool please refer to Maya documentation manual, but for now load up the textures that I’ve already painted for the shot, they are located in the ‘sourceimages’ folder: (Larry_Face.iff) and (Henry_Face.iff):

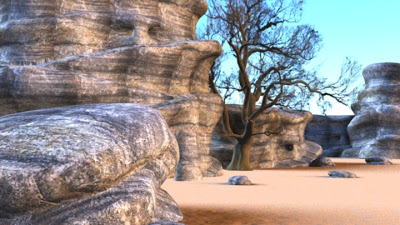
8.) ADDING ENVIRONMENT: Environments & props will add production value your shot, it doesn’t have to be complicated, just simple objects will do, in my shot I had a pre-modeled mesh, to show it just click on the V button next to Environment to unhide it, then test render:

9.) SEPARATE LAYERS AND POST:: Now comes the beauty of Post Production. In post applications like: After Effects, Nuke, Digital Fusion, you could do lots things to enhance your final image, things like, DOF, color grading, glow, etc. To be able to do so we need to separate the rendered image into layers, usually we render everything in passes, Shadow Pass, Reflection Pass, Occlusion Pass, Z Depth Pass, Motion Vector Pass, & ID Pass, but for the sake of this demonstration, we’ll split the image into two passes only, Characters and Background.
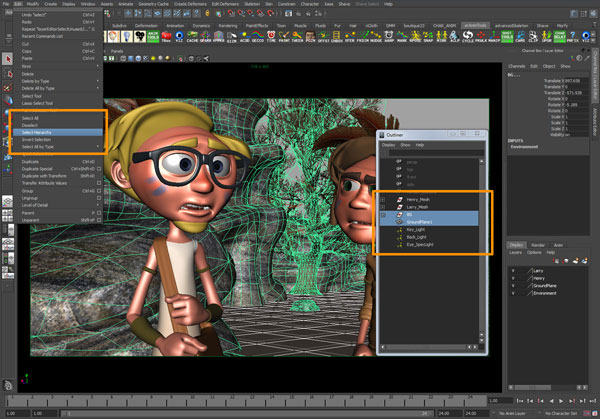
From the Outliner window, select the ‘BG’ & ‘GroundPlane1’ meshes, then go to Edit > Select Hierarchy to select all the components:
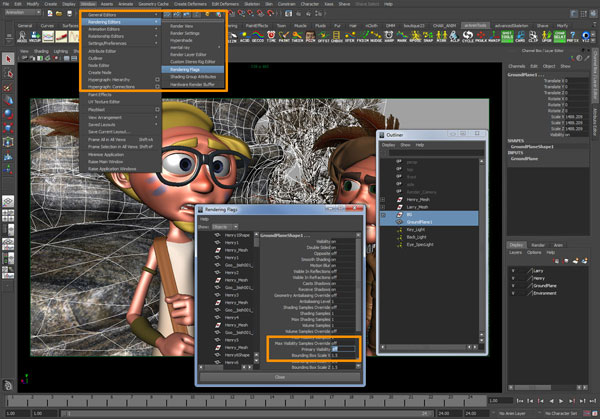
Then go to Window > Rendering Editors > Render Flags, and switch the ‘Primary Visibility’ from On to Off, this will hide the BG:
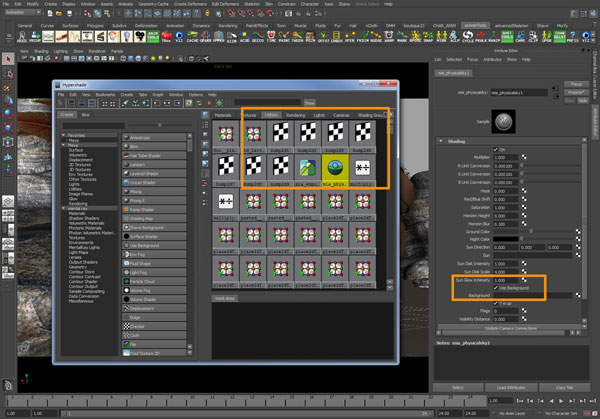
Now Open the Hypershade Window, Click on the Utility tab, then double click on ‘mia_physicalsky and tick the option box next to ‘Use Background’ to turn it on, this will hide the Sky dome, then test render:

Save the rendered image in (.iff) format to use it later in post. Now ‘undo’ the last few steps of this chapter, then hide ‘Larry’ & ‘Henry’ & do a test render, save the result image in (.iff) format as well:
Now you can take the rendered images to your favorite compositing application to give it this extra push, Normally I like to use Fusion for post processing. Here is how my final comp looks like:

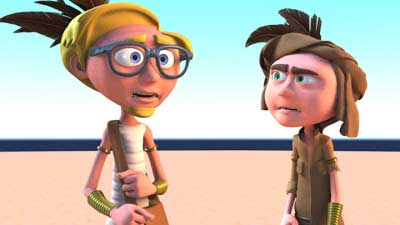
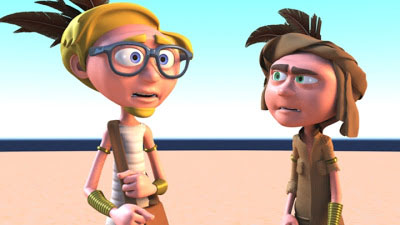
10.) FINISH: Here is a ‘before and after’ compression. Done!


