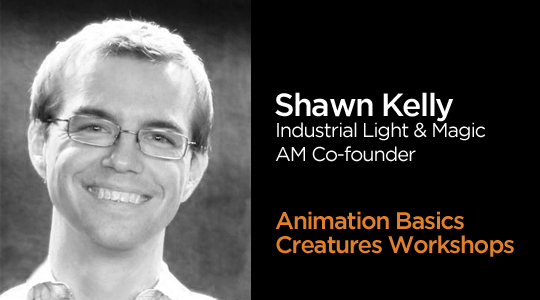
Basically, the idea is this—if you nail the timing and posing of the body (hips, torso, etc), then the position of the feet will already be dictated by the position/timing of the body, so if you just hide the feet and legs to begin with, and block in the body, you get the feet/legs for FREE. It might sound terrifying, but it really works! Learn how with Shawn Kelly.
This is a blast-from-the-past post! An old Animation Mentor post that is still super relevant today. Enjoy.
Okay, so here we go. First of all, like most great tricks, this isn’t something I thought of myself. It was handed down to me by someone I consider to be one of the most talented animators I know—Glen McIntosh, Animation Supervisor at good old ILM—and boy oh boy did I have a hard time wrapping my head around it.
The trick is this: if you’re doing an action scene, you hide the legs until you’re happy with the body animation.
That’s it. It isn’t terribly complicated, but man—it was really scary for me at first, but I have to say, I’ve found it extremely helpful.
Basically, the idea is: If you nail the timing and posing of the body (hips, torso, etc), then the position of the feet will already be dictated by the position/timing of the body, so if you just hide the feet and legs to begin with, and block in the body, you get the feet/legs for “free.”
My first reaction to this was incredulous. “How do you know where to put the hips if you can’t see the feet!?” I had a really hard time imagining working this way. I’ve always been a pose-to-pose guy for the most part. Thinking about my scenes as a series of (hopefully) strong full-body poses. I couldn’t imagine ignoring such important parts of a pose when blocking in my work.
What I’ve found, however, is that this method can save you some time, as long as you still do your planning, and know (at least in your mind) what your main poses need to end up looking like. You’ll likely have to get in there and adjust the hips and body position slightly to accommodate issues that might pop up when you start dropping in your leg animation, but for the most part, if the body truly looks right, the feet ought to work.
The big bonus is that you don’t have to slow down to constantly reposition your feet if your character is running around, flipping, spinning, jumping, etc. I was amazed to discover what an anchor the legs were on my “blocking time” and how much spending time with them really slowed me down.
The trick is this: if you’re doing an action scene, you hide the legs until you’re happy with the body animation.
I’ve used this method on four films now, and I’m finding that in any action-intensive scenes, I’m relying on this method more and more to block my work in quickly.
As an example, there was a scene in Star Wars 3: Revenge of the Sith where I had this idea of having Yoda chop this guy down and then throw his lightsaber at another guy, leap up onto his chest, pull out the lightsaber as the guy falls, and then leap over the dying guy’s head to attack the next clone trooper in line.
This was one of the first times I really used Glen’s trick of hiding the legs, and it worked so well for me that I used his method throughout that entire sequence.
First thing I did was hid his legs and feet, including the nurbs-curves of the foot controllers. So now I’ve got legless Yoda just standing there. I left his arms showing, left his head on, and kept his butt/hips so I could at least see the line of action going through his body (which helped me plan where I’d want the feet to plant later on, in order to have the strongest poses and silhouettes.)
I blocked in the whole shot this way. Legless Yoda floating around, killing clones, throwing his saber, jumping, landing on the guy’s chest – all of it. Once the timing of the body felt right to me—which, by the way, meant that it didn’t feel floaty at all, but felt like he was actually landing on feet, of course—then I turned the legs back on.
The legs are IK, so of course he was basically just flying away from his feet, and he looked like a ridiculous green mini Superman at first, but as I started to block in the feet, I was blown away by how easy it was.
I placed his feet on the first frame into the pose I had already been planning to aim for and then simply moved frame-by-frame through the shot (animating the feet in a continuous “straight-ahead” style) and looked for the frames where his legs would suddenly hyper-extend and do the wonderful “IK-POP” we all know and love so much. When I’d find that frame, I’d simply back up one frame, save a key on that foot, and then start to raise it on the next frame. I’d go forward until his body started to “fall” onto the foot (the down part of his run), back up a couple frames, plant that foot that had just hyperextended a few frames before, and viola! He was running around!
In other words, his body position was dictating when I’d have to lift the foot, or else the legs would hyperextend and pop.
So far, I’ve animated 2-legged Yoda this way, 3-legged walkers in War of The Worlds, and the 4-legged dragon in the upcoming Eragon, as well as a couple things I’m not allowed to talk about yet (sorry! Don’t you hate that?!), and it’s been incredibly useful in every case, regardless of the shape of the creature or how many legs it happened to have…
You might be thinking this sounds insane, which is exactly what I thought when Glen tried to convince me, but it’s worth giving it a try if you’ve never experimented working this way. Maybe, like me, you’ll find it handy.
Yes, it’s a slightly “layered” approach to your animation, but I still think of my work as 100% pose-to-pose. I’m merely putting off adding the feet to the pose that I already know I’ll eventually want.
The benefit of this is primarily a savings in time. Instead of mucking around with the feet as your move through the shot, inevitably creating a lot of keys that will probably have to be adjusted throughout the blocking process, you’re ignoring them until you know exactly where they will need to be placed, and exactly what their timing will have to be in order to accommodate the cool timing of the body that you’ve just nailed down.
Hope that’s helpful! Keep animating, and as always—have FUN!
Want to learn animation from pros like Shawn?
Start your animation journey by learning with professional animators from a variety of studios and career paths! Get more information about Animation Mentor’s Character Animation Courses.